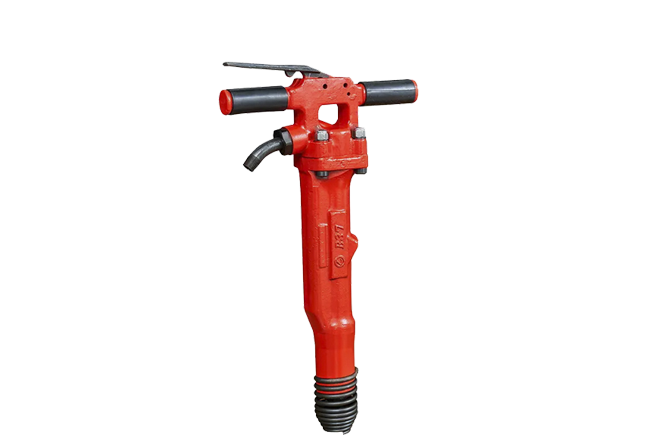

Extracting a Pin from a Jack Hammer
Hammering the pavement can be tough, which is why jack hammers are such a great tool for demolition or pavement-breaking jobs. They strike with plenty of power, but before one gets to wield such an implement it is important to know how to take out the spike. Here is an illustrated road map for safely and efficiently removing a spike from a jack hammer.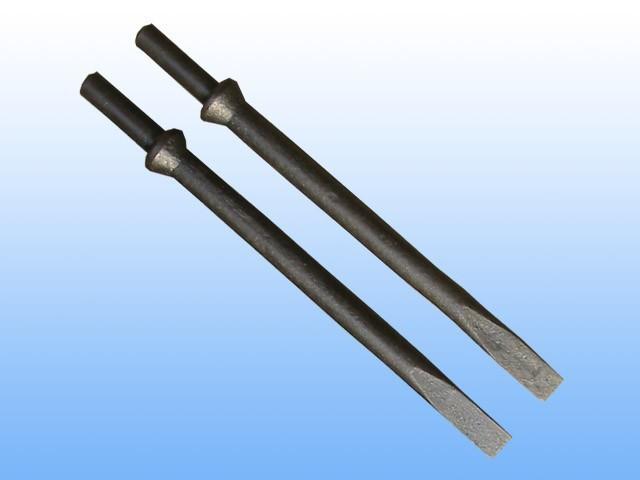
Disconnecting the Jack Hammer – A Guide to Getting Started.
Prior to removing the spike from a jack hammer, be sure to disconnect it from any electrical power source. Jack hammers usually run on electricity, so it is important to disconnect it before beginning the task; otherwise, the hammer might be inadvertently set off during the removal process.
Stripping Away the Outer Shell
Before delving into your jack hammer, you need to take off its outer armor. Usually, a trusty screwdriver is all you need to detach the screws that secure the shield. Nevertheless, try not to be too hasty with the cover’s removal; behind it hides potential hazards in the shape of edged edges that could injure carelessly gloved hands.
After lifting the lid, a person should be able to view the inside of their jack hammer. Near the base of the structure, one should spot an anchor secured by a nut.
Gently Untighten the Bolt
The following action requires loosening the nut that holds the spike in its current position. Whetting a wrench or socket will help complete this task. It is imperative to ensure that the nut is just loose enough so that no struggle occurs when taking it off, yet tight enough to prevent it from completely slipping away.
Step 4: Unplug the Spike
To extricate the spike from the jack hammer, an individual should tenderly tug on it until it is wholly detached. Taking care when unyoking the spike is paramount as it can be pointy and result in harm if not taken care of prudently.
Install the New Nut: The Final Step
Once the spike had been taken out, it was time to reinstall the nut that held it in situ. For this, the nut had to be threaded onto the spike and then tightened with either a wrench or a socket. It was advantageous to make sure the nut was adequately secured, yet still movable when necessary.
Finalizing the Process: Connecting the External Cover
To bring the jack hammer to completion, all that is left is to attach its exterior cover. This can be achieved by tightening the cover with any appropriate instrument such as a screwdriver. After it is firmly secured, the jack hammer is then readied for operation.
From time to time, you may need to remove the spike from a jackhammer – but doing so does not have to be a hassle. Just remember these simple steps and you’ll be all set: with a bit of care, you can ensure your jackhammer is ready to work as good as new for many years to come.
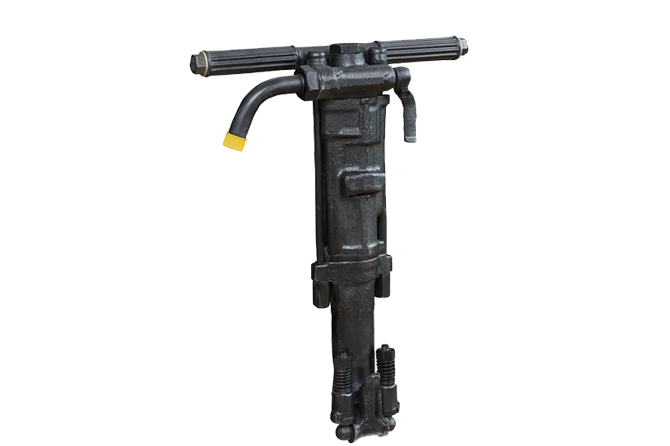
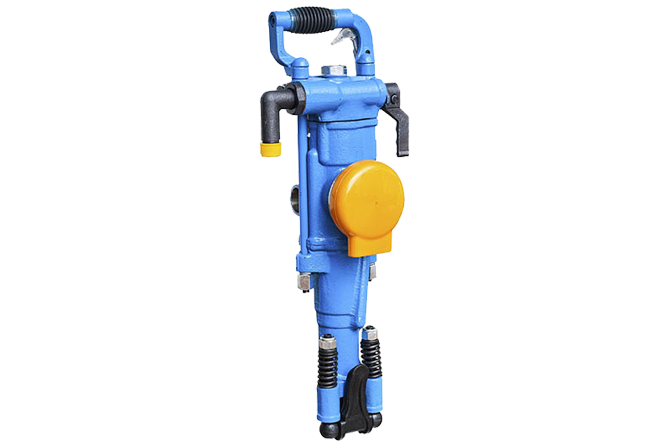
Jackhammers are a go-to tool for breaking through hard surfaces like asphalt and concrete. Also known as ‘pavement breakers’, jackhammers are powered by electric, pneumatic or hydraulic motors and their components include a head, handle, air compressor and spike – a sharp metal protrusion that does the heavy-lifting. In spite of their incredible power, it is important to handle jackhammers with care as they can be dangerous if not handled correctly.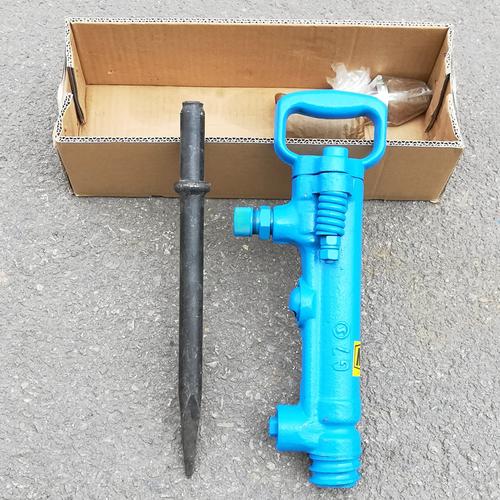
With the right know-how and safety protocols in place, taking out the spike from a jackhammer can be a breeze. This guide will provide the information you need to make sure you can easily and safely remove a spike from a jackhammer.
The power supply must initially be disconnected to begin extracting a spike from a jackhammer. This is accomplished by either disengaging the power lead from the wall connection or switching off the air compressor. When the energy source is no longer connected, the user can pinpoint where the spike is located. As a rule, it will be situated in the posterior area of the jackhammer’s head.
When the spike has been identified, one should use a wrench to cautiously loosen the nut that locks the spike into place. If done incorrectly, this can cause harm to the jackhammer. When the nut has been loosened, pliers can be employed to extract the spike from the head of the instrument. Be sure not to tighten it too firmly – you wouldn’t want to cause any unnecessary damage.
After extraction, users should examine the spike for any marks of wear or corrosion. If scuffs or abrasions have been identified, it is incumbent upon the user to replace the spike before reinstallation. Moreover, a thorough review of the jackhammer head should be completed to detect any blemishes or signs of destruction. An instant substitution ought to take place if signs of damage exist before proceeding to reinstall the spike.
After the safety-check is done and dusted, it’s time to put the spike back together. Start by slotting the spike into position within the jackhammer head, and then ensure that it’s held firmly in place with a nut – just don’t get too rusty-fingered with it! Over-tightening can easily cause damage, so ease off the screws for a hammer with a longer lifespan.
Before even thinking of taking that spike out of the jackhammer, it is absolutely vital for an individual to pay heeds to safety! It is essential to cut the power off or disconnect it before even attempting to take that spike out. Additionally, do have a proper look at the spike and the hammer for any damage or signs of wear before returning it back to its mount. By following these steps one would be guaranteeing himself or herself a safe and successful operation of extraction of the spike.

Short Description: YT29A air-legged rock drills are heavy-duty push-leg (air-legged) rock drills with low energy consumption, which are more suitable for drilling horizontal or inc […]

Short Description: The YT28 air-leg rock drill is a kind of high-efficiency, energy-saving and environmentally friendly rock drilling equipment. Compared with similar pneumatic pro […]

Short Description: The YT27 air-legged rock drill is a highly efficient lightweight rock drill suitable for downward or inclined drilling in medium-hard or hard (f=8 – 18) ro […]

Product description: (S250 jackleg Drill) has been the preferred choice of miners who demand high performance, superior control and lasting reliability. the S250 jackleg allows ope […]

Scope of application: Model S82 air-legged rock drills are heavy-duty air-legged rock drills with high efficiency and low consumption, which are especially suitable for use in the […]

Product introduction Y26 hand-held rock drill is mainly used for drilling shell holes and secondary blasting in mines, railroads, water conservancy, and rock works, which can dry a […]

Product description: Y24 hand-held rock drill is a variant of YT24 air-leg rock drill in our factory. It has the advanced level in China and was rated as the high quality product i […]

Product description: Y20LY hand-held pneumatic leg dual drill is a kind of light rock machinery, which can be used in secondary blasting in mines and quarries as well as in stone w […]

Product Description: Y18 hand – held and air – leg drill is suitable for drilling and blasting holes on soft, medium and hard rocks and W-1.5/4, W-1.8/5, W-2/5 and othe […]
